Paracentesis / Thoracentesis — Dictation, Appropriateness, and Dose for Residents
1. The 3 PM Consult: Tense Ascites, Attending on the Phone
It’s 3 PM on a Tuesday. The medicine team pages a stat consult: a cirrhotic patient with tense, painful ascites needs a large-volume paracentesis before they can get their diuretics optimized. Your attending is on the phone with another service but expects a clean, comprehensive procedure note in the chart within the hour — one that documents ultrasound guidance, fluid volume, labs sent, and any immediate complications. This isn’t a complex case, but the documentation has to be perfect.
When I was a fellow, these “bread and butter” procedures were my chance to prove I was efficient and safe. A sloppy note suggests a sloppy procedure. Getting the details right — like remembering to specify albumin replacement for large-volume taps — is what separates a good resident from a great one. We’ll walk through a template that ensures you hit every key point, every time. For other high-yield tools, check out the residents and fellows resource hub, which has free calculators and references we all use on call.
2. What an Image-Guided Paracentesis or Thoracentesis Report Covers and What Attendings Look For
Image-guided paracentesis (for ascites) and thoracentesis (for pleural effusion) are fundamental IR procedures. They can be both diagnostic (to figure out why the fluid is there) and therapeutic (to relieve symptoms like shortness of breath or abdominal pain). Ultrasound guidance is now the standard of care; it dramatically reduces complications like organ puncture or hitting an aberrant vessel compared to the old landmark-based “blind” technique.
Your attending expects a procedure note that clearly documents:
- Indication: Why was the procedure performed? (e.g., therapeutic drainage for symptomatic relief, diagnostic tap for suspected spontaneous bacterial peritonitis).
- Pre-procedure Findings: Confirmation of a safe, accessible fluid pocket with pre-procedure ultrasound, and a review of labs (INR, platelets).
- Technique: A step-by-step summary including site prep, local anesthetic, needle/catheter used, and confirmation of real-time ultrasound guidance.
- Results: The total volume and character of the fluid removed, and a list of all laboratory studies the fluid was sent for.
- Post-procedure Status: Patient tolerance, hemostasis at the access site, and for a thoracentesis, the result of the post-procedure chest X-ray.
Hitting these points demonstrates thoroughness and attention to safety, especially the critical details like albumin replacement protocols for large-volume paracentesis or volume limits for thoracentesis to prevent re-expansion pulmonary edema.
3. Radiology Report Template for Image-Guided Paracentesis / Thoracentesis
This is a solid, all-purpose template for a standard paracentesis or thoracentesis procedure note. You can adapt it for your institution’s specific EMR or dictation system. The key is to be systematic.
Technique
Procedure: Ultrasound-Guided [Paracentesis/Thoracentesis]
Indication: [e.g., Symptomatic large ascites, Diagnostic evaluation of new-onset pleural effusion, Rule out spontaneous bacterial peritonitis]
Consent: Informed consent was obtained from the patient after the risks, benefits, and alternatives of the procedure were explained. All questions were answered.
Labs Reviewed: INR [value], Platelets [value] x 10³/µL.
Technique: The patient was placed in the [supine/decubitus/sitting upright] position. A pre-procedure ultrasound was performed to identify the largest and safest fluid pocket in the [e.g., left lower quadrant of the abdomen / right posterior chest]. The skin was marked.
The skin was prepped and draped in the usual sterile fashion. The skin and subcutaneous tissues down to the [peritoneum/pleura] were anesthetized with 1% lidocaine. Under real-time ultrasound guidance, a [size]-gauge needle/catheter was advanced into the fluid collection. A sample was aspirated to confirm position.
A total of [volume] mL of [serous/serosanguinous/cloudy/bloody] fluid was aspirated and the catheter was removed. A sterile dressing was applied. The patient tolerated the procedure well.
Findings
A total of [volume] mL of fluid was removed. The fluid was sent for the following studies:
- Cell count and differential
- Gram stain and culture
- Albumin, total protein, LDH, glucose, pH
- Cytology
(For Thoracentesis): A post-procedure chest radiograph was obtained, which demonstrated [e.g., no evidence of pneumothorax].
(For Large-Volume Paracentesis >5 L): Per protocol, the patient will receive [e.g., 50 grams of 25% albumin] intravenously post-procedure to prevent circulatory dysfunction.
Impression
Successful ultrasound-guided [paracentesis/thoracentesis] with removal of [volume] mL of fluid, as described above. No immediate complications.
Results of fluid analysis are pending.
4. Free Template Sources for Other Radiology Procedures
Building a personal library of high-quality templates is a key part of residency. While you’ll get many from your attendings and senior residents, two great free repositories exist online that are worth bookmarking:
- RadReport.org: This is the RSNA-curated library. It’s comprehensive, peer-reviewed, and covers nearly every modality and subspecialty. It’s an excellent source for standardized, best-practice templates.
- Radiology Templates (AU): Maintained by Australian radiologists, this site offers a fantastic collection of practical, user-friendly templates that are easy to search and adapt.
Both are non-commercial and provide a solid foundation for your own macro collection.
5. The Next-Level Move: From Free-Form Dictation to Structured Report
The template above is great for manual dictation, but the real friction on call comes from juggling the dictaphone, the measurements, and the specific reporting requirements for complex cases. This is where AI-assisted reporting can make a huge difference. Instead of dictating line-by-line into a rigid template, you can describe the positive findings in free form — “Ultrasound shows a large fluid pocket in the left lower quadrant, I’m marking a spot medial to the spleen…” — and the AI handles the rest.
Tools like GigHz Precision AI are designed for this workflow. It takes your natural-language dictation of findings and automatically generates a clean, structured report based on pre-loaded ACR and SIR templates. It also helps surface relevant Clinical Decision Support (CDS) guidance where applicable, ensuring your reports are not just fast, but also compliant with the latest standards. This approach streamlines the documentation process, letting you focus more on the procedure and less on the clerical work.
6. When Should You Order This Procedure? ACR Appropriateness Criteria
While paracentesis and thoracentesis are often ordered by primary medical teams, it’s crucial for radiologists to understand the appropriate clinical context. The American College of Radiology (ACR) provides guidance, particularly in complex scenarios like sepsis where identifying the source of infection is critical.
For a patient with suspected or confirmed sepsis, image-guided fluid drainage plays a key role. If a patient presents with sepsis and respiratory symptoms like cough or dyspnea, a chest radiograph is the first step. However, if that radiograph is normal or equivocal, a diagnostic thoracentesis is often appropriate to evaluate a pleural effusion as a potential source.
Similarly, in a septic patient with acute abdominal pain, ascites may be the septic focus (i.e., spontaneous bacterial peritonitis). In this setting, an initial imaging study like a CT may be performed, but a diagnostic paracentesis is usually appropriate to sample the fluid. Even in septic patients without localizing symptoms, if fluid is identified in the chest or abdomen on screening imaging, sampling that fluid is a high-yield, appropriate next step to guide antibiotic therapy.
7. Paracentesis / Thoracentesis Procedure Protocol
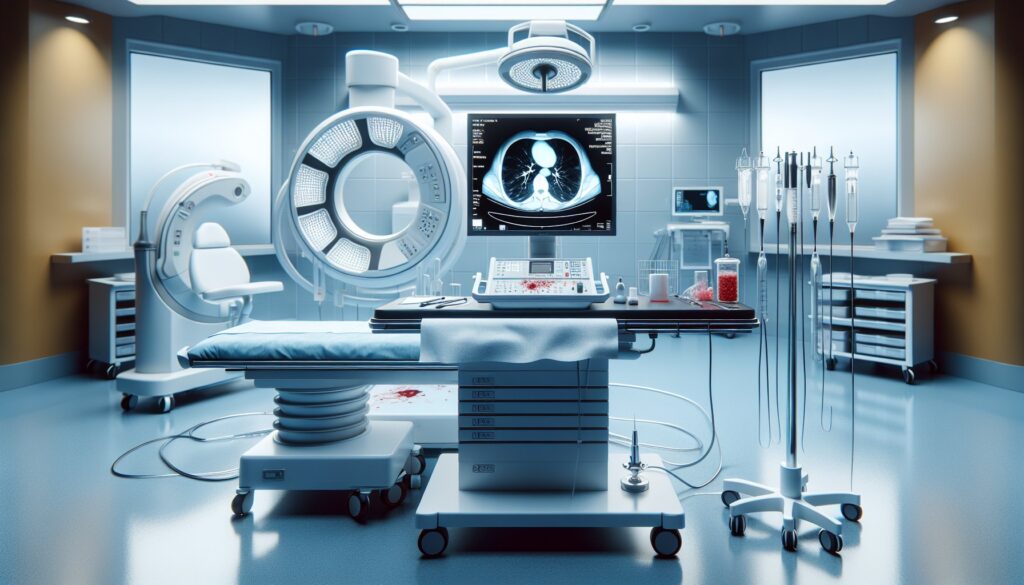
The protocol for image-guided fluid drainage is centered on safety and sterility. The key steps ensure accurate targeting, minimize patient discomfort, and prevent complications like bleeding or infection. Ultrasound is the critical component, providing real-time visualization of the needle tip relative to the fluid pocket and surrounding organs.
The table below outlines the standard sequence for an ultrasound-guided paracentesis or thoracentesis.
| Phase | Details |
|---|---|
| Pre-procedure US | Identify the largest, safest fluid pocket. Use color Doppler to identify and avoid intervening vessels. Mark the entry site on the skin. |
| Sterile Prep & Drape | Clean the marked area with chlorhexidine or Betadine. Place a sterile drape to create a sterile field. |
| Local Anesthesia | Infiltrate 1% lidocaine at the entry site, creating a wheal. Anesthetize the subcutaneous tissues and the path down to the peritoneum or pleura. |
| Catheter/Needle Insertion | Under continuous real-time ultrasound guidance, advance the drainage needle or catheter along the anesthetized track into the fluid collection. |
| Fluid Removal | Aspirate fluid for diagnostic studies first. Then, drain therapeutically via gravity or gentle suction. Adhere to volume limits (1-1.5 L for thoracentesis; consider albumin for >5 L paracentesis). |
| Catheter Removal | Once drainage is complete, remove the catheter and apply firm pressure. Apply a sterile dressing. No suture is typically required. |
| Post-procedure Imaging (Thoracentesis) | Obtain an upright expiratory chest X-ray to rule out pneumothorax. |
Common Pitfalls: A common pitfall is inadequate local anesthesia, which causes unnecessary patient discomfort. Be generous with the lidocaine, especially along the deeper track. Another is failing to use Doppler before picking a site, which risks puncturing an intercostal or epigastric artery. Finally, for therapeutic thoracentesis, draining too much fluid too quickly (>1.5 L) can lead to re-expansion pulmonary edema, a serious complication.
8. The 3-Months-Free Offer for Radiology Residents and Fellows
3+ months free for radiology residents and fellows
Look like a rockstar on your reports — dictate positive findings in free form, and the AI generates a structured report using ACR + SIR templates with the appropriate clinical decision support firing automatically. All we ask in return is your feedback so we can keep improving the product for trainees.
The signup process is simple. There is no credit card required and no long forms. To get started, just provide these three items:
- Your PGY year (e.g., PGY-2, PGY-4)
- Your training type (radiology residency or specific fellowship — IR, body, MSK, neuro, peds, breast, nucs)
- Your training program / hospital name
- (Optional) Your institutional email
Reply with these details when you apply for the residents free-access program, and we’ll get your account set up.
9. Frequently Asked Questions (FAQ)
Is GigHz Precision AI HIPAA-compliant?
Yes. The platform is designed for de-identified workflows by default. It processes the clinical details of your dictation without requiring patient identifiers (PHI), ensuring compliance with HIPAA privacy and security rules.
Do I need my hospital’s IT department to set this up?
No. GigHz Precision AI is browser-based and requires no local software installation or special permissions. It works on any modern computer, including the shared workstations in the reading room or your personal laptop or iPad at home.
How does this work with PowerScribe or other dictation systems?
It works alongside your existing dictation system. You can dictate your findings naturally, then copy the structured report generated by the AI and paste it directly into your PACS/RIS. It complements your existing workflow rather than replacing it.
Can I use this on my phone or iPad on call?
Yes, the platform is fully responsive and works well on mobile devices. This is particularly useful for reviewing templates or drafting preliminary reports from your iPad while on call away from a dedicated workstation.
Can I customize the templates for my institution’s preferences?
Yes, while the system comes pre-loaded with ACR and SIR standard templates, you can create, modify, and save your own custom templates to match the specific formatting or phrasing your attendings or institution prefer.
What happens after my residency or fellowship ends?
Trainee accounts are intended for use during training. After you graduate, you can transition to a standard attending-level subscription. We offer discounts for recent graduates to help you get started in your new practice.
Free GigHz Tools That Pair With This Article
Three free tools that complement the material above:
- Imaging Appropriateness Selector — Type an indication or clinical scenario in plain language and get the imaging studies the ACR rates for it, with adult and pediatric radiation levels. Built directly from 297 ACR topics, 1,336 clinical variants, and 15,823 procedure ratings.
- GigHz Imaging Protocol Library — A searchable library of 131 imaging protocols with the physics specs surfaced and the matching ACR Appropriateness Criteria alongside. Plain-English narratives readable in 60 seconds, organized by modality.
- GigHz Radiation Dose Calculator — Pick the imaging studies a patient has had and see total dose in millisieverts (mSv) with comparisons to natural background radiation, transatlantic flights, and chest X-rays. Useful for shared decision-making.
Reviewed by Pouyan Golshani, MD, Interventional Radiologist — August 4, 2026